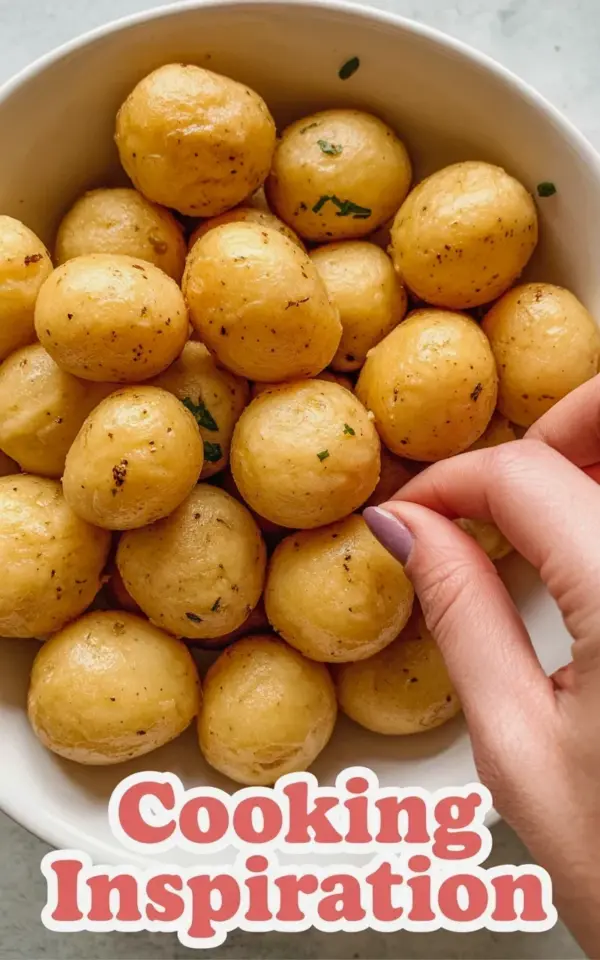
Those golden spheres in the white ceramic bowl, they look absolutely perfect. You can practically hear the crunch from here, that shattering first bite giving way to a cloud of fluffy, steaming potato inside. The specks of black pepper are visible against the crispy exterior, and the fresh green herbs scattered through the bowl add a pop of color. It’s the kind of easy lunch idea that makes you wonder why you ever bothered with sandwiches. But let me be real with you for a second. Getting to that point of perfection with homemade potato bites is a lot trickier than it looks, and there is one specific mistake that turns this dream into a greasy, sad mess. This is my favorite crispy potato balls quick lunch recipe, but we need to talk about the details first.
Why Your Potato Balls Turn Out Greasy Instead of Crunchy
Ok so, the culprit behind soggy, oily potato balls is almost always moisture. I don’t care how hot your oil is or what kind of potato you use, if there’s excess water on the surface, you’re going to have a bad time. The water instantly cools the oil down, and instead of frying, you end up boiling the potato in its own steam. That’s how you get that heavy, leaden texture that sits in your stomach like a brick.
Here’s the thing about frying: hot oil and water are sworn enemies. When you drop a damp potato ball into the pan, the water tries to escape violently, causing splatters and leaving you with a coating that never gets a chance to brown. The exterior steams, the inside gets gluey, and all that lovely crispiness you were dreaming about just melts away into the oil. Honestly, I’ve been there, standing over a pan wondering where I went wrong while my kitchen smelled like a fast food joint. It’s not a good look.
The Simple Drying Trick That Changes Everything
You need to pre-cook those potatoes and then let them dry out properly before they ever see the hot oil. I usually boil my potatoes until they’re just fork-tender, then I drain them and spread them out on a clean kitchen towel to cool completely. Don’t rush this step. And here’s the weird little detail that makes all the difference: after they’re cool, I give them a gentle squeeze over the sink (wrap them in the towel first) to push out any stubborn pockets of water. Trust me on this, you’ll be shocked by how much liquid comes out.
Some people skip the boiling step altogether and just grate raw potatoes, but that’s a whole other beast. For this particular recipe, we want that creamy, mashed interior that contrasts with the crunchy outside. So, we boil. We dry. We chill. It sounds extra, but the payoff is worth every single second of waiting time.
- Boil the potatoes until they are just soft enough to mash, not falling apart.
- Drain them thoroughly and let them sit in a colander for a few minutes.
- Spread them on a tea towel to cool for at least 20 minutes.
- Squeeze out the excess moisture before you even think about seasoning.
Seasoning and Binding Your Potato Mixture
So, you’ve got your dry, cooled potatoes. Now it’s time to make them taste like something. I like to mash them with a generous knob of butter, a splash of warm milk (this is key, cold milk makes them gummy), and a big pinch of salt. Then I go wild with the cracked black pepper. I mean, really, be heavy-handed with it. That pepper is what gives these fried potato snacks their bite.
For binders, you need something to hold the ball together. A single egg yolk and a sprinkle of cornstarch work wonders. The egg yolk adds richness, and the cornstarch acts as a glue, absorbing any last bits of moisture and helping the exterior get extra shattery when it hits the oil. And fresh herbs, don’t you dare use dried ones here. Chives, finely chopped parsley, or even some dill, all of them work beautifully.
Oh, and one more thing, you can add a pinch of chili flakes if you want a little heat. I won’t judge. I’m a firm believer that a tiny bit of spice cuts through the richness of the frying oil and makes the whole thing taste more complex.
How to Shape Perfectly Uniform Potato Bites
Ok so, the mixture needs to be cold. Not cool, cold. I pop my bowl in the fridge for at least 30 minutes after mixing. This makes the whole process a million times easier because the mixture stiffens up and doesn’t stick to your hands like some kind of edible glue. Then, I dust my palms with a little flour, grab a small handful, and roll it into a ball. You want them to be about 1-inch in diameter, roughly the size of a golf ball.
Uniform size is your friend. It’s not just for looks, it’s for cooking consistency. If you make one ball tiny and another one huge, the small one will be overdone and the big one will be raw in the middle. And nobody wants a soggy center surrounded by a burnt shell. So take your time, get them equal. Roll them smooth, and if you see any cracks, just patch them up with a little press of your fingers.
Here’s a random thought that always pops into my head when I’m doing this: I think about those fried green olives you get at fancy bars. They’re all perfect little spheres, evenly browned, and they taste incredible with a glass of something cold. That’s the energy I’m going for here. Just a perfect little orb of potato joy.
The Right Oil Temperature for the Frying Process
Let’s talk about the oil and the heat. This is where the magic happens, and also where things can go very, very wrong if you’re not paying attention. I use a neutral oil with a high smoke point, like canola or peanut. Sunflower oil works great too. You don’t want to use extra virgin olive oil here, it burns at a lower temperature and will leave you with a bitter taste and a smoky kitchen.
Get your oil to about 350°F (175°C). If you don’t have a thermometer, you can eyeball it by dropping a tiny piece of potato in. If it sizzles and floats right away, you’re ready. If it sinks like a stone and barely bubbles, the oil isn’t hot enough. Wait. And if it turns brown before you can even count to ten, it’s way too hot and will burn the outside of the balls before the center is cooked.
I fry in batches, never overcrowding the pan. If you dump them all in at once, the temperature drops, and you’re back to square one with greasy potato balls. Give them room to swim. It takes about 3 to 4 minutes per batch, just rolling them around gently with a slotted spoon until they are golden-brown all over. The color should be deep and even, that picture-perfect hue you see in the photo.
A Seasonal, Trend-Aware Twist on a Classic
Look, this recipe is timeless, but I love to adapt it based on what season it is. In the spring, I add a handful of finely chopped ramp leaves or wild garlic to the mixture alongside the chives. They give it a subtle oniony kick that feels fresh. In the fall, a little grated parmesan and some sage work wonders, giving the whole thing a Thanksgiving-adjacent vibe.
It feels like everyone is doing some version of a loaded potato bite these days, which I think is great. It’s the perfect picky-food trend that everyone can get behind. But the classic version, just potatoes, pepper, and herbs, will never go out of style. It hits that perfect savory spot that you just can’t replicate with sweet potato or cauliflower-based alternatives.
Here’s the thing, I considered adding a cheese center to these. Just a little cube of mozzarella in the middle of each ball. And honestly, it’s fantastic. But it also makes the frying process more temperamental because the cheese can burst out and leak into the oil. So for a true quick lunch recipe, I keep it simple. Save the cheese pull for something else.
Make-Ahead Tips and Batch-Freezing Strategy
These crispy potato balls are actually a fantastic meal prep option. You can form them the night before, arrange them on a baking sheet lined with parchment paper, and pop them in the fridge. Then, when lunch rolls around, all you have to do is heat the oil and fry. It turns a mid-week lunch into a five-minute job.
They also freeze like a dream. Just put the tray of shaped balls in the freezer for an hour or two until they’re solid. Once they’re frozen solid, you can transfer them to a zip-top bag and keep them for up to a month. You can fry them straight from the freezer, just add a couple of extra minutes to the cooking time. It’s the ultimate easy lunch idea when you’re staring into the fridge and finding absolutely nothing.
Just be careful when they come out of the oil, they hold their heat like crazy. That first bite is always the hottest. I can’t tell you how many times I’ve burned the roof of my mouth because I got too excited and bit into one before it cooled down. It’s a dangerous game, but I always play it. I just love those fried potato snacks too much to wait.
Anyway, let’s get back to that visual. Those crispy potato balls sitting in that white bowl in the photo, they look glossy from the oil, speckled with pepper, and the green herbs on top make them look almost too pretty to eat. Almost. The hand reaching in with the purple nails is about to grab one, and I feel that in my soul. That’s the universal sign of “I cannot wait another second for this.
The texture is everything here. A loud, audible crunch. Then, a soft, warm, fluffy cloud of potato that tastes like pure comfort. That’s the goal. That’s what you get when you respect the process and dry your potatoes properly. Don’t skip it, don’t rush it, and you’ll never be disappointed.
Let this be your new go-to for a satisfying twist on a classic comfort food. It’s a little bit of effort for a huge return, and honestly, it’s the kind of food that makes a regular Tuesday feel like a special occasion. I hope you give it a shot.
Leave a Comment